1953 Fender Super
This 1953 Fender super was brought to us in need of some fairly routine maintenance for an amplifier of this age. The leather handle on top had broken some time ago and needed to be replaced. It also had old metal envelope pre-amp tubes and the original electrolytic capacitors that we will be upgrading with new, high-quality parts.
Before we started, we gathered everything we needed. We also are replacing the power cable as the one in the amp currently was a replacement to the original but wasn't done very well and was in need of an upgrade.
The first thing we did was replace the handle with this new brown leather one. They are easily found and the process is quite simple. doing this first will also help us to move the amp around for the rest of the work needed.
Here, you can see where the current power cable is coming through the chassis and is soldered to the fuse and power switch. In addition to the fact that the outer covering of the cable has been cut away quite roughly and left bare wires hanging out, there is only a bulky wrap of tape preventing this cable from being pulled out of place.
Now we have replaced the former power cable with a 3-prong cable that has been properly soldered to the fuse, power switch and ground. We have also added a proper cord clamp to keep the cable in place and to put help take the brunt of any potential pulling on the cord.
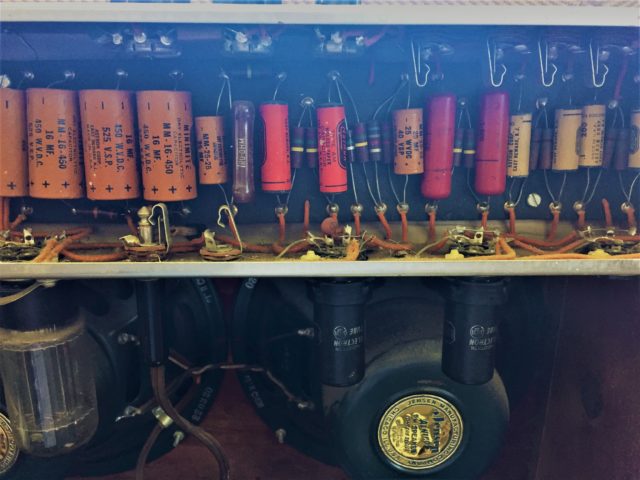
Here were are looking at the bulk of the circuitry in the amp. The large brown cylinders to the left (and several of the smaller ones in this picture) are electrolytic capacitors, sometimes called filter capacitors. These large caps help filter noise out of the power supply and when they are bad, they can cause a multitude of problems such as noise, parasitic oscillation and power supply failure. The smaller caps help to shape the overall tone of the amp and bad ones can cause the amp to sound weird/bad or make no noise at all. Electrolytic capacitors have a lifespan, usually intended around 15 years. In most amps, they will last much longer than that but, in this particular amp these original caps are 65 years old and definitely in need of replacement.
Here we have replaced all of filter caps with brand new ones. We always use the highest quality caps available when doing a repair like this as the higher build quality leads to a superior result in both lifespan and functionality. It is not recommended to replace these on your own as they store large amounts of DC voltage, sometimes for weeks at a time. You could get electrocuted even if the amp is unplugged.
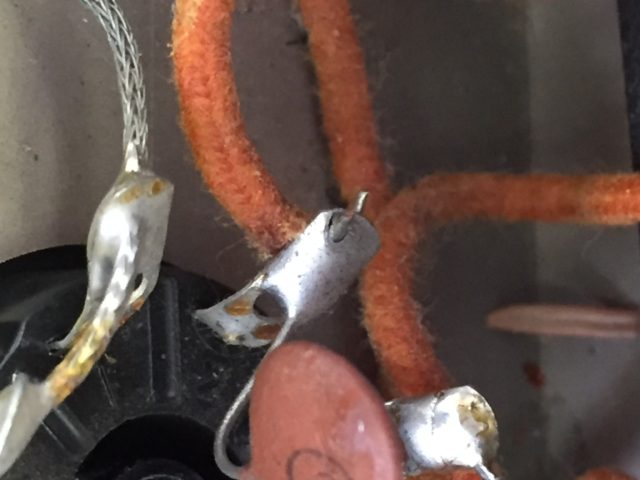
While working on this amp, we also came across this broken solder joint. A broken solder joint can occur from a bad solder job or from movement breaking the connection. Here you can see this wire is just sitting in a hole of solder but isn't actlly connected. This is a fairly simple thing to repair but, very important to look for.


