2001 Fender Strat Deluxe Refret – Some Of The Worst Fret Wear We Have Ever Seen!

This 2001 Fender Strat Deluxe came into the shop in serious need of a refret. While the refret we did on this guitar is pretty standard, this is the first refret blog covering a maple fretboard, and also features a dent repair on the fret surface.

Here you can see the extreme divots in the frets from years of heavy use. This is some of the worst fret wear we have ever had come through the shop. We will be replacing these through our normal process. there is also a small ding in the fretboard, above the top fret in this picture, to the left of the B-string. We will be repairing this later.

On this guitar, the frets are pulling out very cleanly with no chipping of the fretbaord. On this guitar, we will not be replacing the nut with a bone one as we normally would do as this model is equipped with the LSR roller nut. These nuts are much less susceptible to the wear that a traditional nut would see and if the height needs to be adjusted, there are thin metal shims that can be added underneath as the nut is bolted down, rather than glued like a typical nut.

Once all of the frets are out, we begin sanding the playing surface and cleaning the fret slots. Then we move on the cutting the new frets.

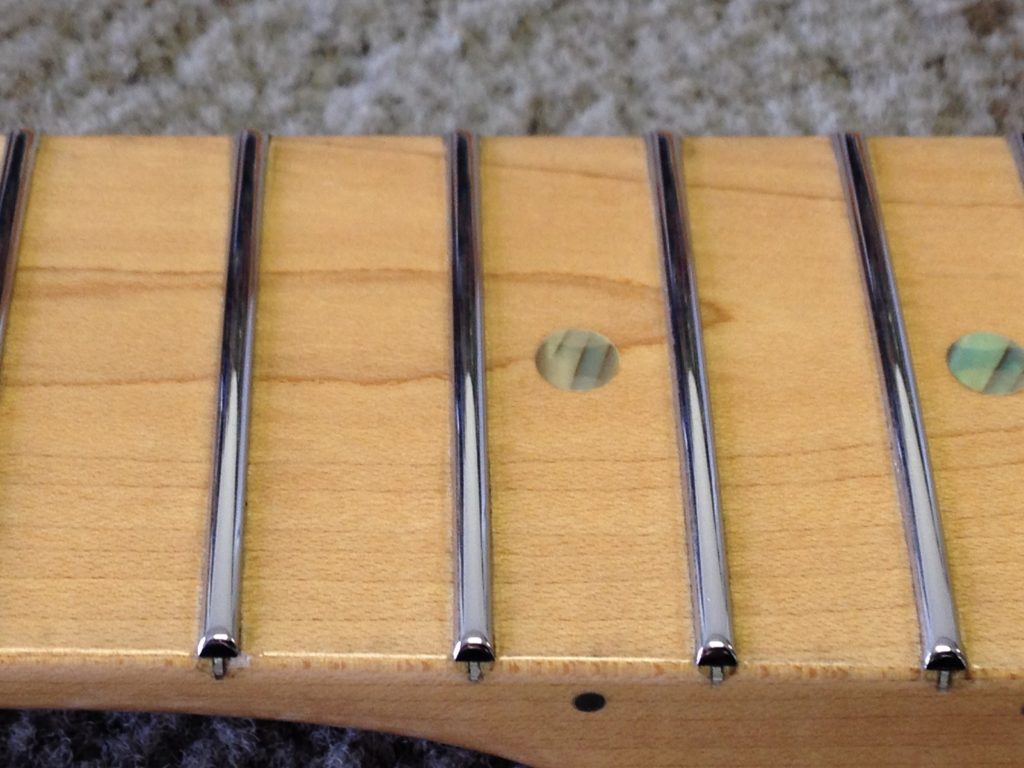
Here, we are pressing the new frets in place. You will notice that the frets are hanging past the edge of the board. On a typical Fender neck, there is no fretboard binding to work around. This means that the frets can be pressed into place first and then cut to the precise length using the fretboard edges as a guide. This results in the same high quality frets but, saves a lot of time on the total job.

Here is a close up of one of the frets after being cut to size. You can also see the ding in the fretboard we mentioned earlier, we'll get that taken care of now.

First we put a dab of superglue into the dent, then we use a razor blade with scotch tape on the ends to even the glue out. The tape provides enough height to prevent the blade from scraping the board but, keeps it low enough to get the glue level.

After the glue has dried, it is sanded lightly, and now you can hardly tell it was there.

Let's get back to the frets. Here, we are sanding the outside edges of the frets to add the bevel, which you can see of this side of the frets. This bevel help prevent the frets from holding strings that have been bent past the edge of the board and also keeps the frets from digging into your hand while playing.

Next, we sand the tops of all the frets with a radius sander. You can see that this one will ensure the frets are all 9 1/2".

After sanding the tops, we use a diamond crowning file to give the frets a smooth, rounded shape.

Once all of that has been completed, we tape off the fretboard for some final polishing.
Here is a close up of the frets after all of the work has been completed on them. Look at that shine!

We have now completed a setup and test of all of the frets. This Strat should be all set for a few more Decades of heavy playing!
More posts in fret repair
-
Friday, June 3rd, 2016
Gibson Hummingbird Refret -
Sunday, January 29th, 2017
James Trussart Steelcaster Refret -
Tuesday, March 14th, 2017
1966 GIbson ES-335 Refret -
Wednesday, April 12th, 2017
1982 Gibson ES-369 Refret and Body Repairs -
Monday, May 15th, 2017
Gibson J-50 Bridge Replacement and Refret -
Friday, December 22nd, 2017
Steve Lynnworth’s 1985 ES-335 and Thoughts on the Cost of Fret Repair -
Tuesday, February 5th, 2019
Fender Telecaster Refret for Robby Coffin -
Tuesday, June 18th, 2019
1960’s Gibson ES-330 Restoration -
Friday, July 26th, 2019
G&L ASAT Refret -
Friday, November 1st, 2019
Jonathan Edwards’ Martin D12-35